Continuous Deployment on Azure App Services - Staging environment
Ok, this is the second post of the serie about Continuous Deployment on Azure App Services (also known as Azure Websites). So if you haven't read the first post with an introduction about Continuous Deployment on Azure App Services you defintly should!
In the first post I showed how to configure a basic website to continuously deploy. In this post I want to show how you can add a staging environment of the website so that you can safely test your code before putting it in production.
Luckly Azure App Services has a pretty good support of staging environemnt which then can be easily be swapped with the current production environment. Note that this functionality is only avaiable with the standard plan.
To create the staging website, open the previously created production website. I you haven't any, check part 1 of this serie on how to create one. Make sure the app runs on a standard plan and go to Settings => Deployment Slots
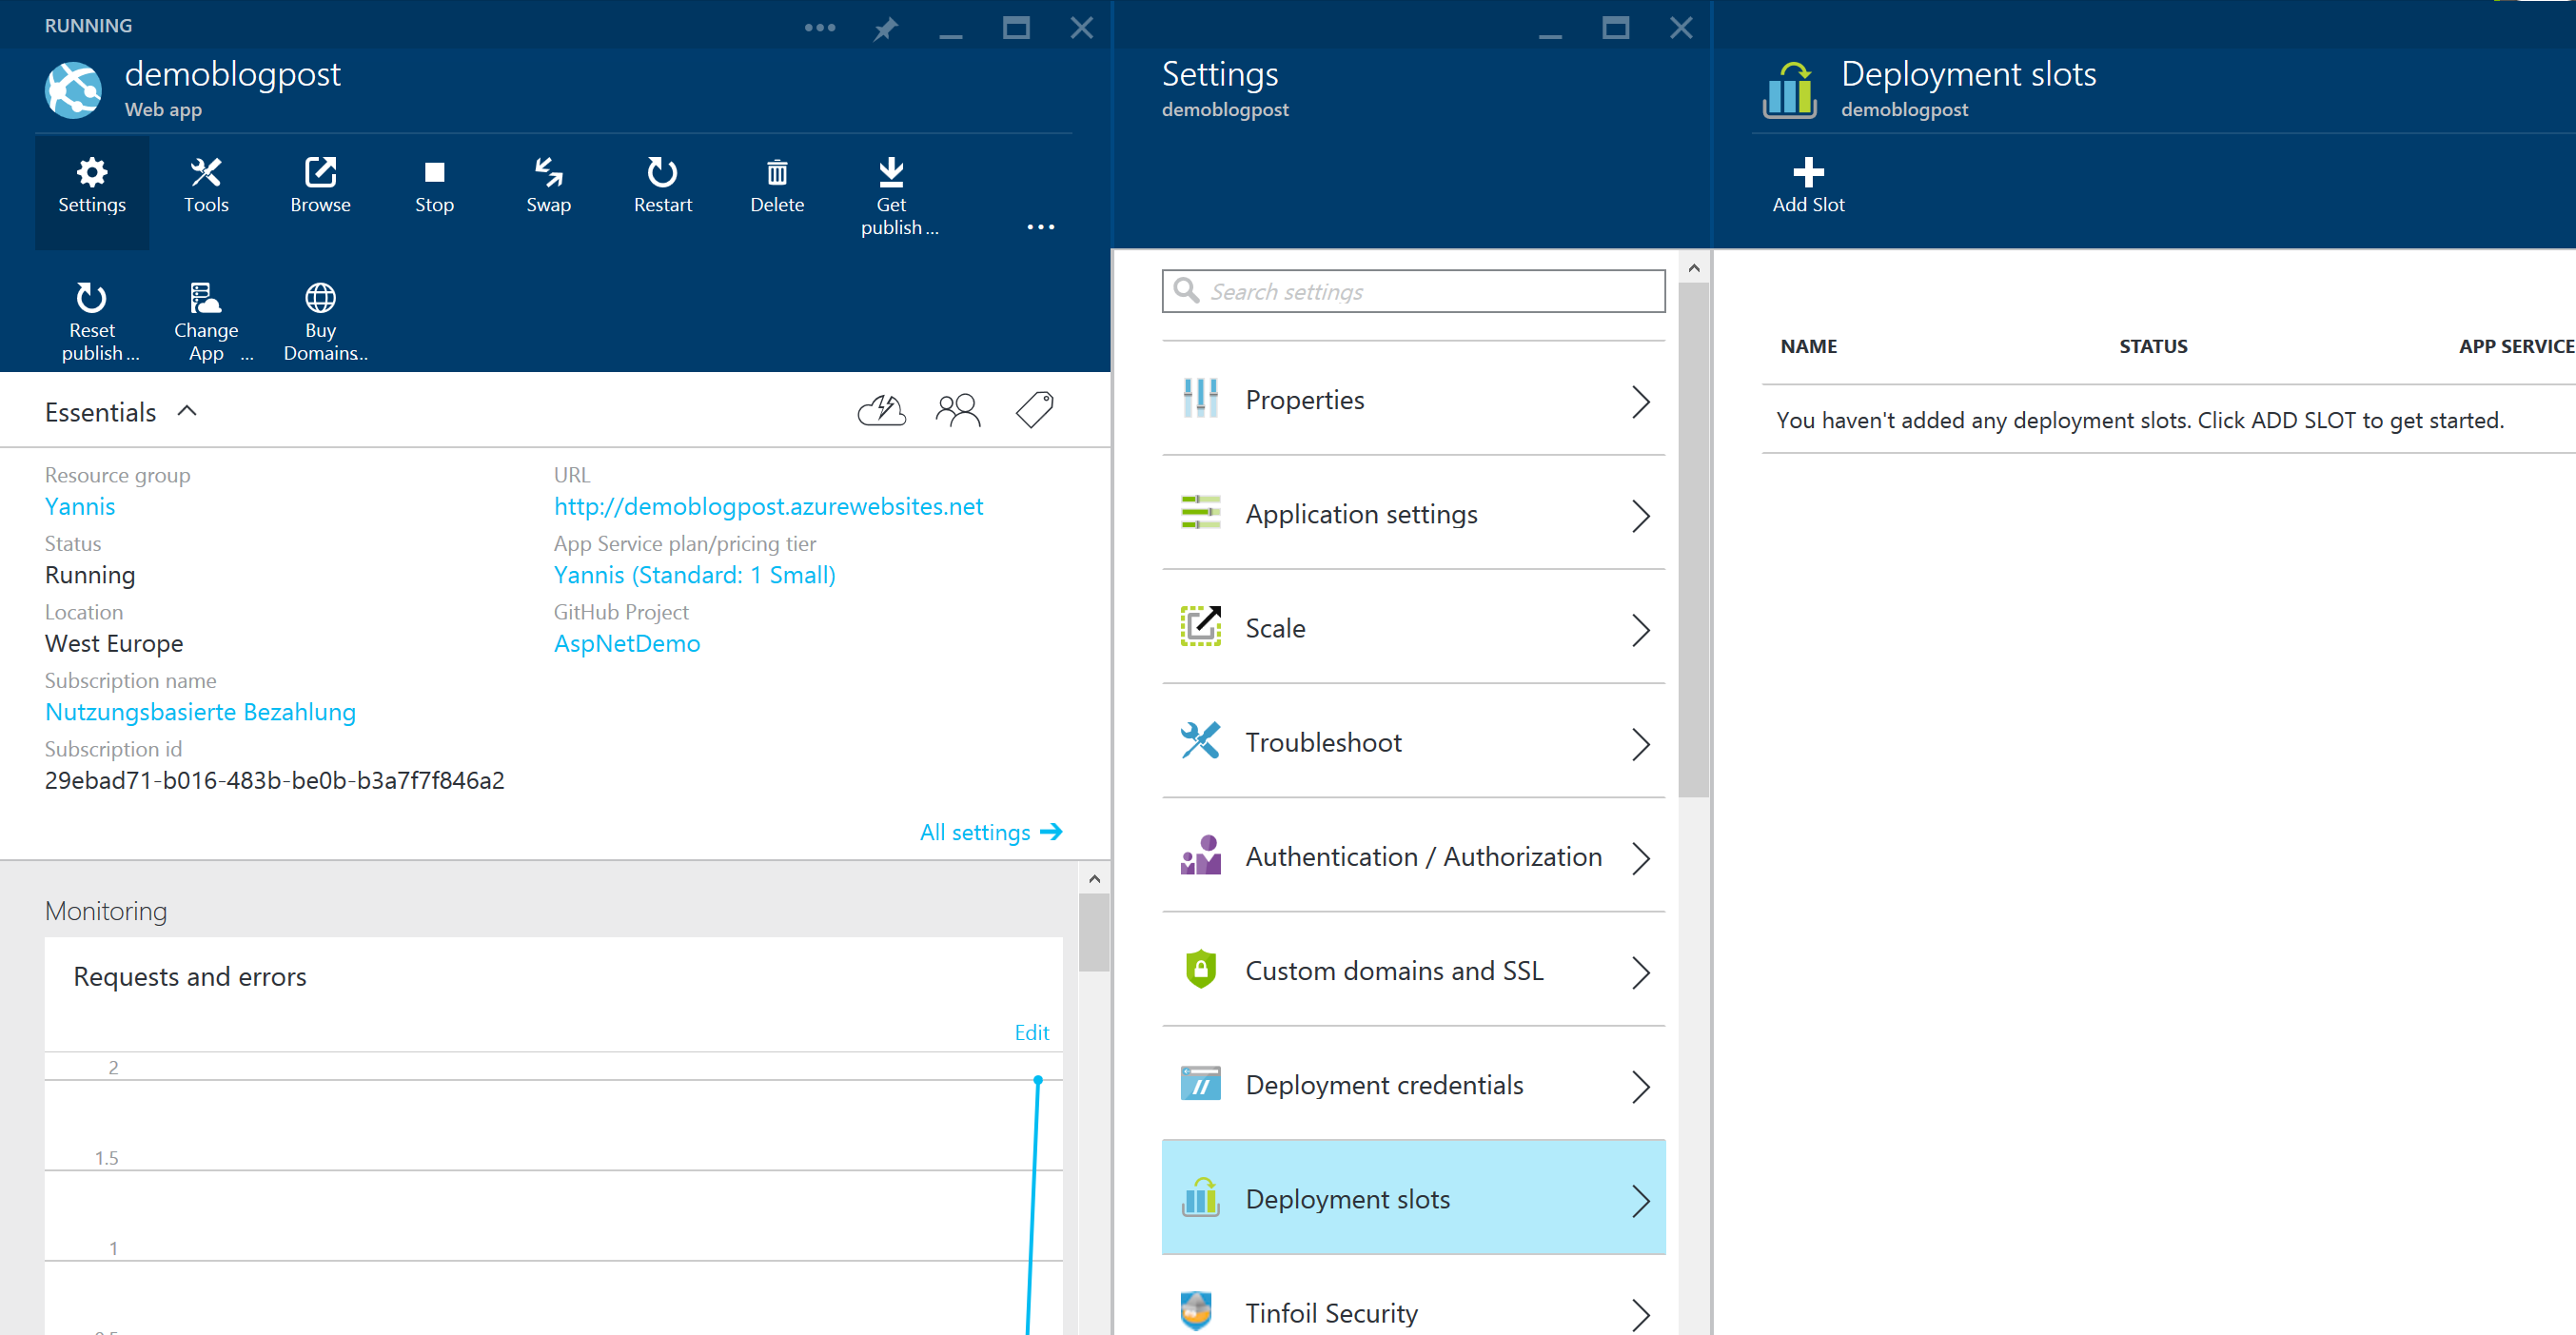
Next click on the Add Slot button and fill the form. I strongly advice taking the production website as Configuration Source.
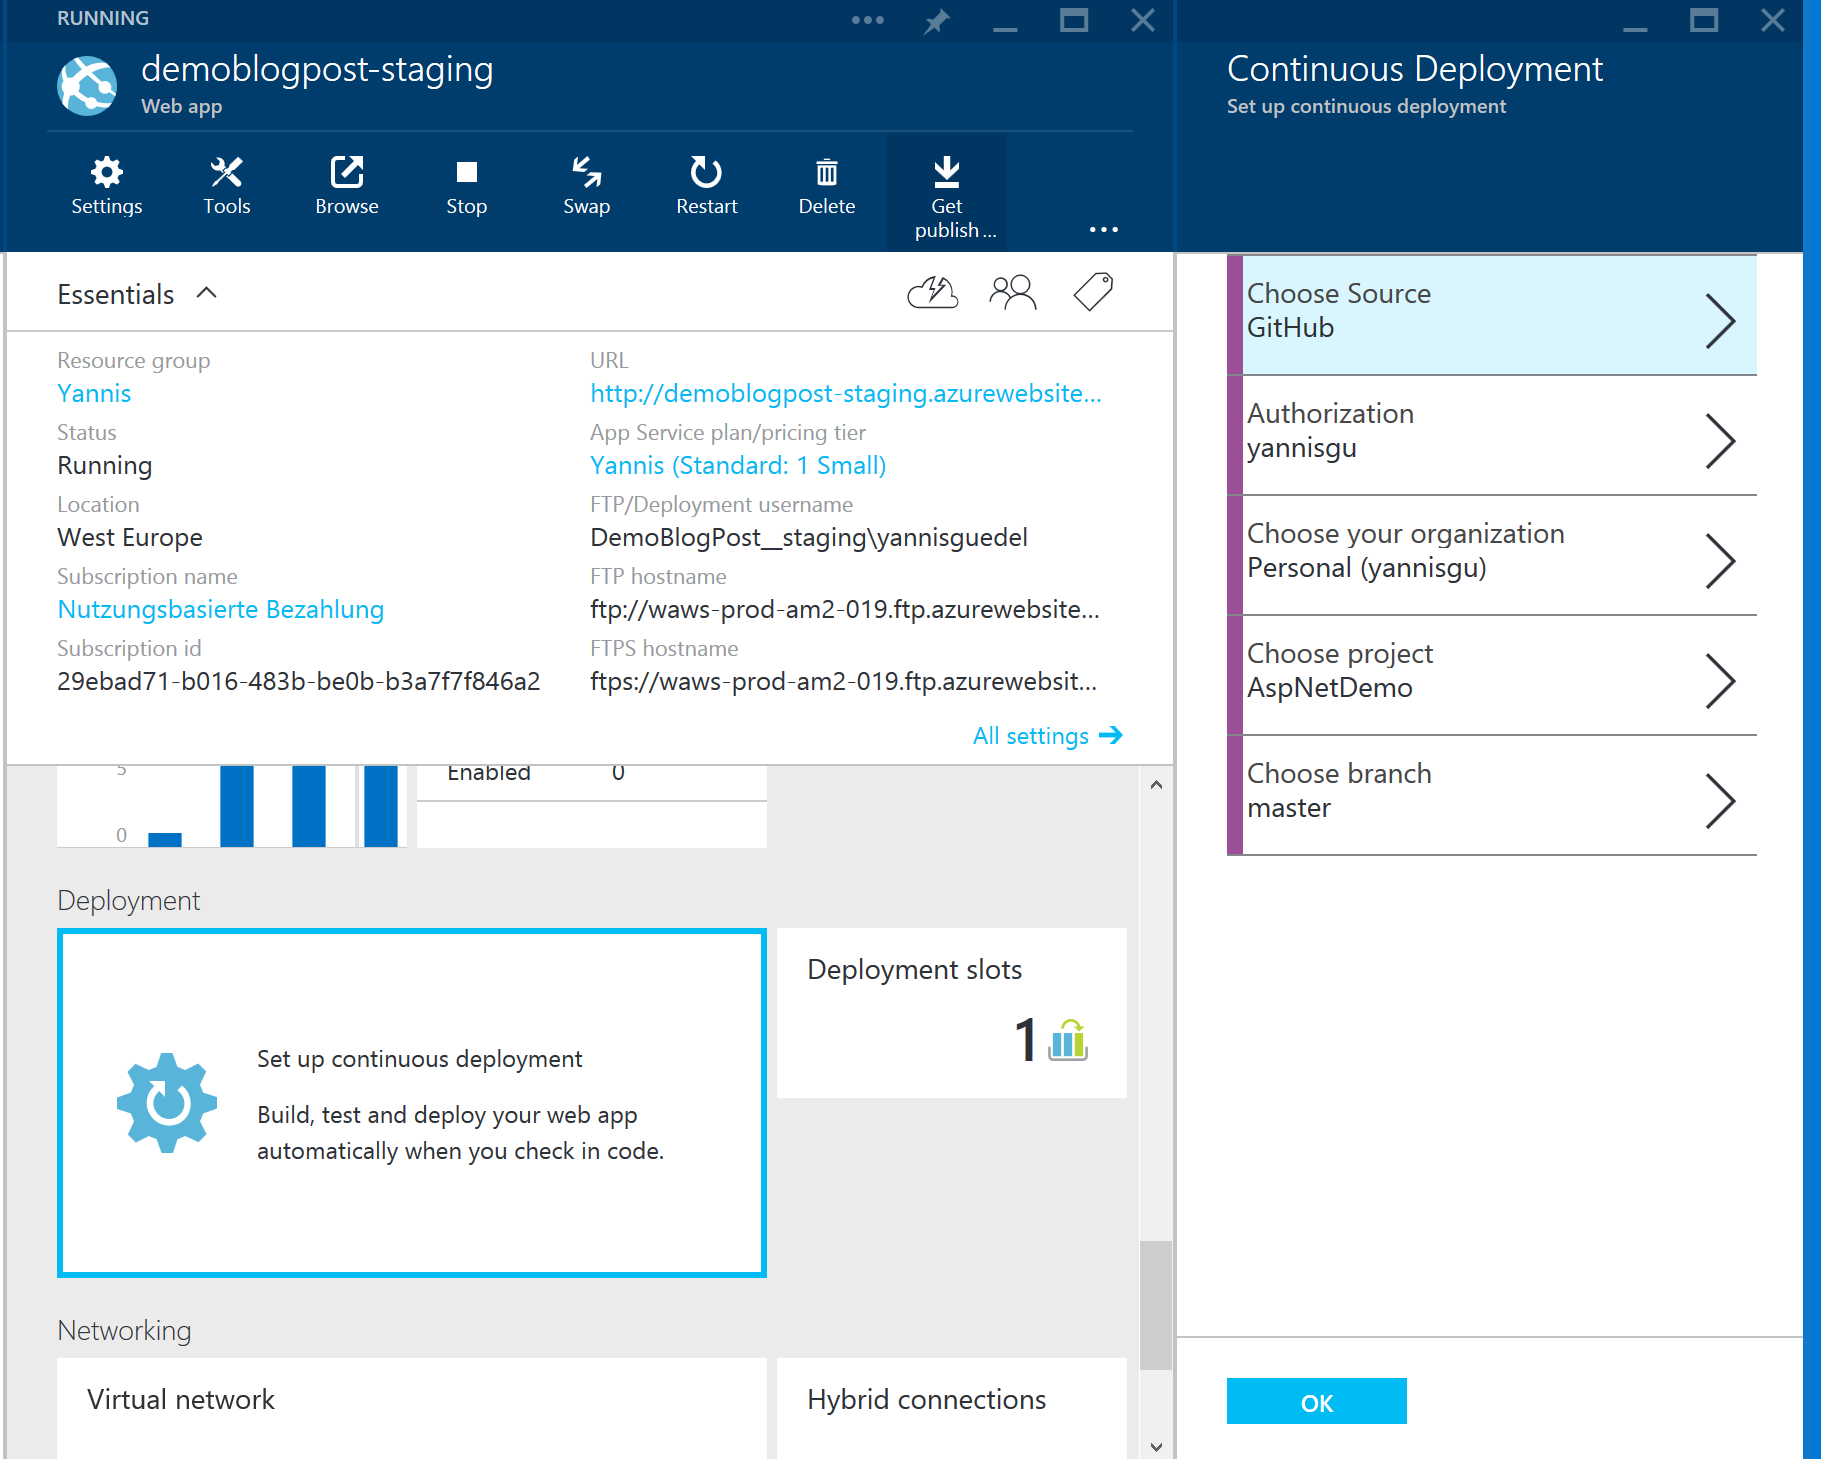
 Now Azure created a copy of our Web App which can be easily be swapped with the original one. On this Web App we now need to reconfigure the continuous deployment as we did for the original one. For this go to
 Deployment => Set up continuous deployment and provide the details of your source code repository.
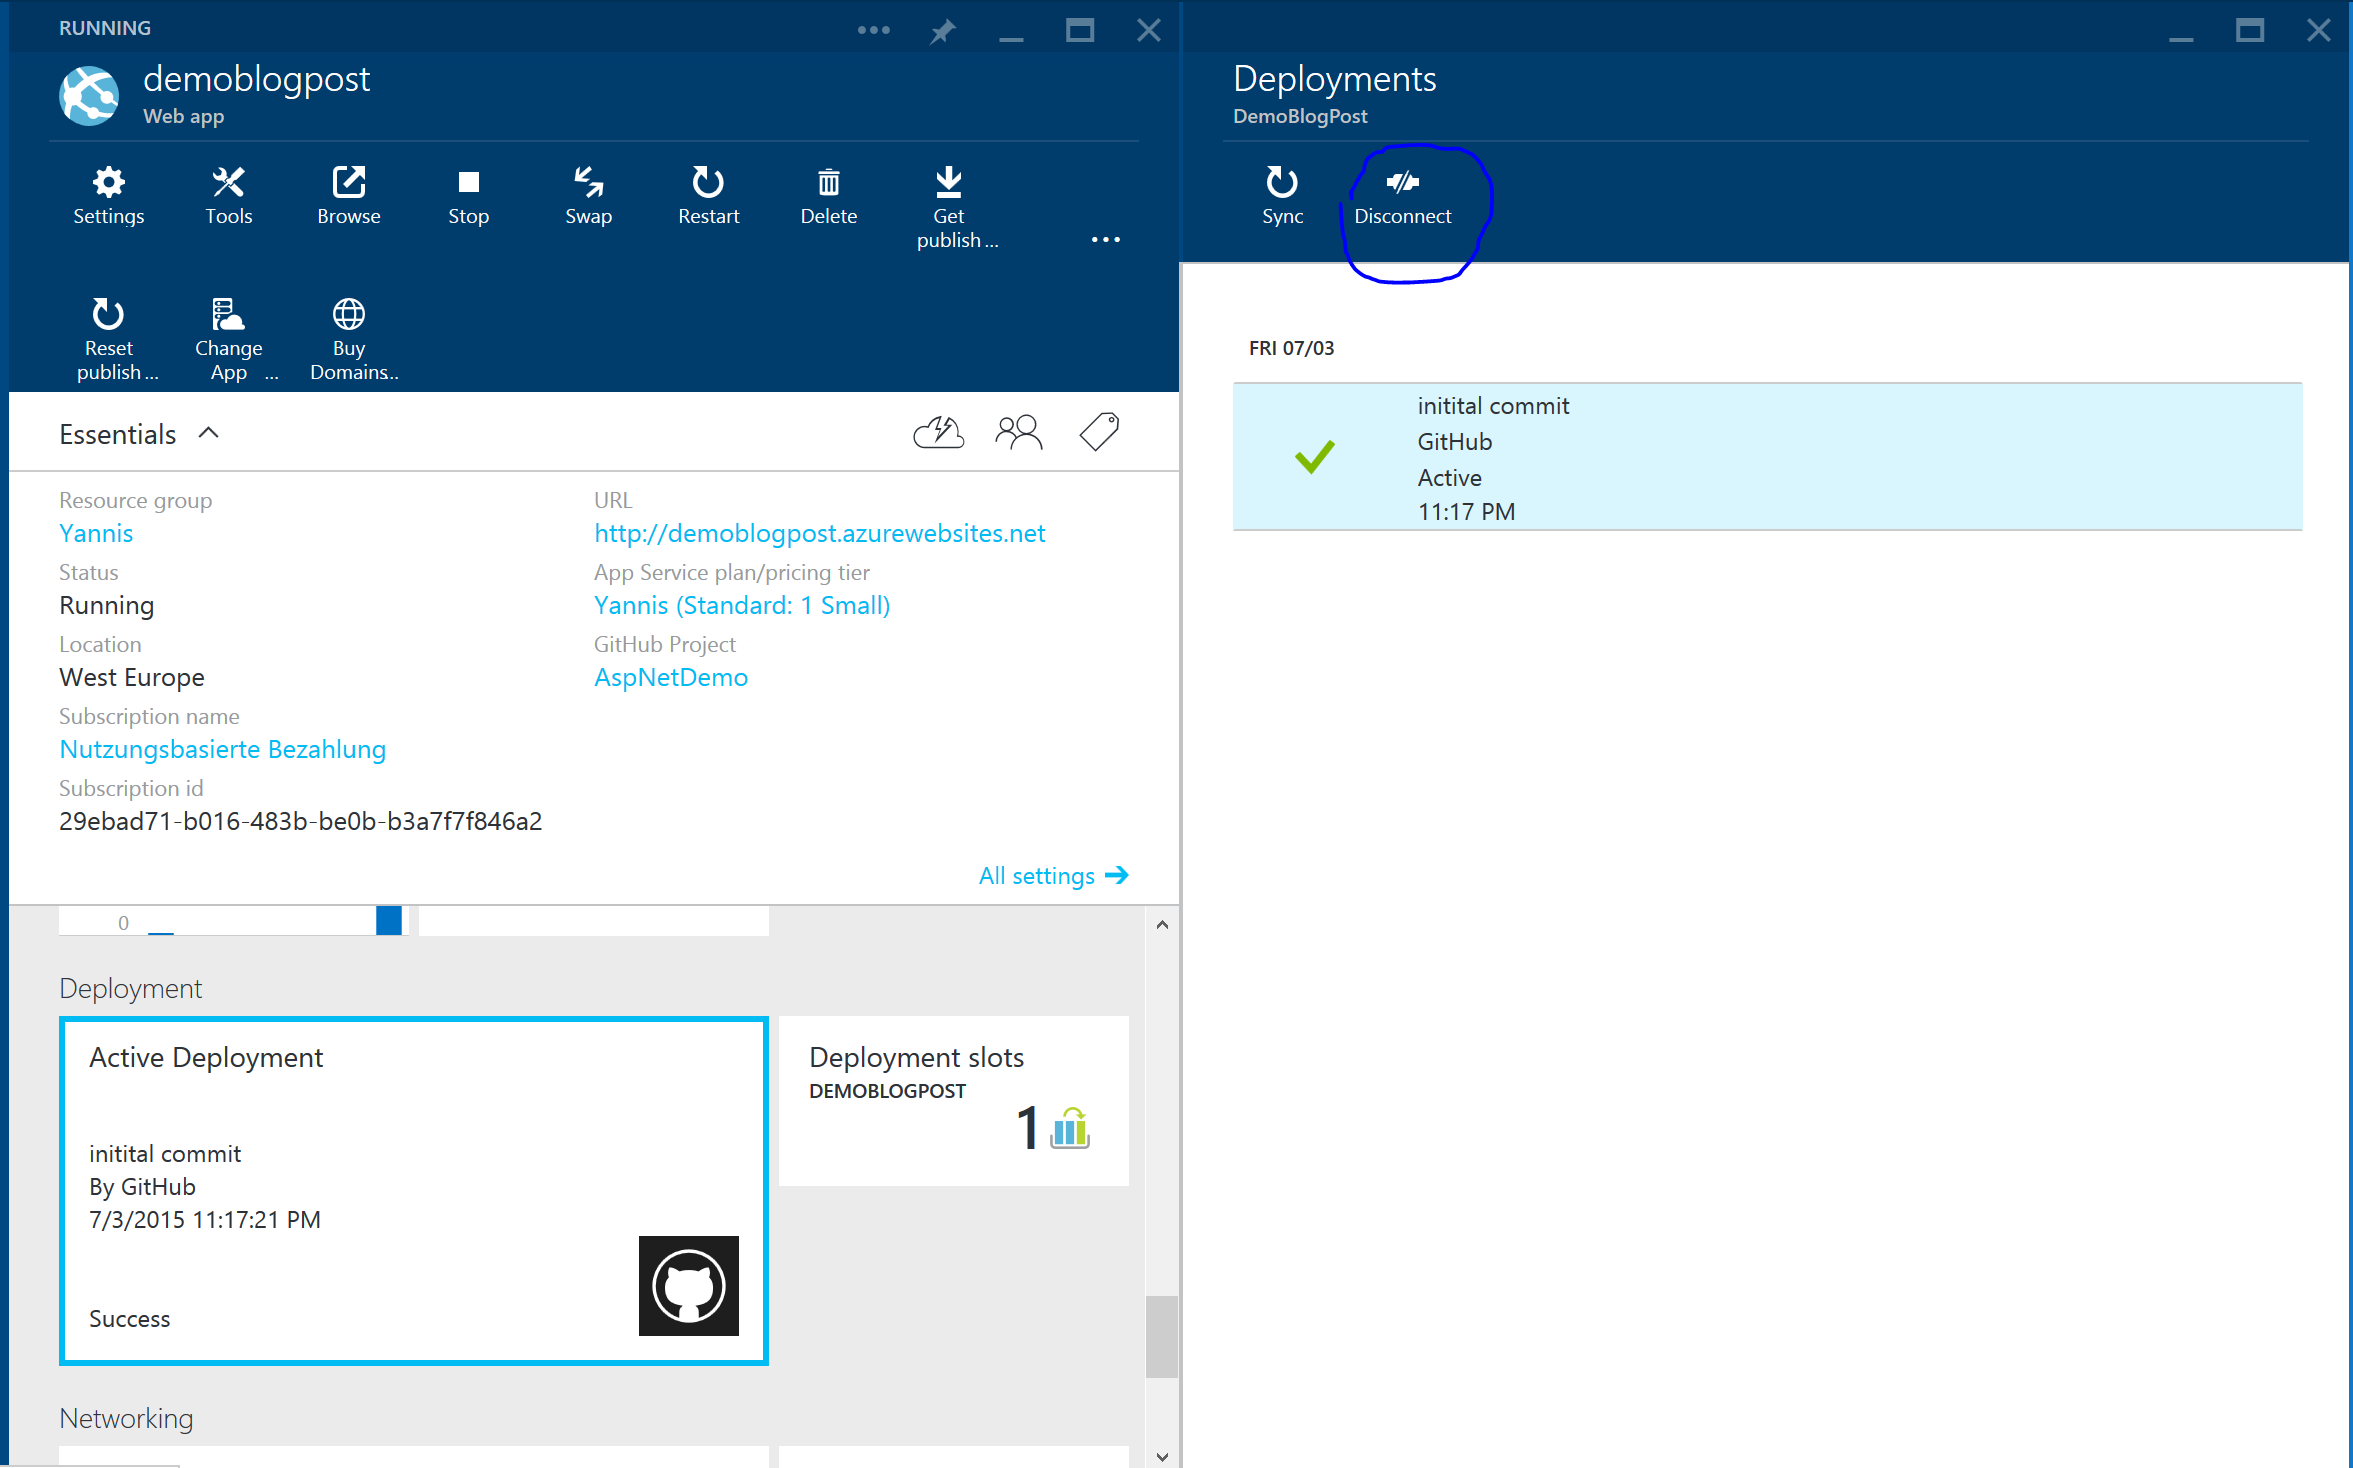
At this point we want all deployment happen on our staging Web App. There should be no direct deployment to our production Web App. That's why we need to disable automatic deployment on the production Web App. So open it and go to the deployment settings. Here simply click Disconnect.
Now when you change something to your code and push it to the master it will deploy the change to the staging Web App. You can then test it here and update it if necessarily. When everything looks good and you want to publish the changes to production, simply press the Swap button.
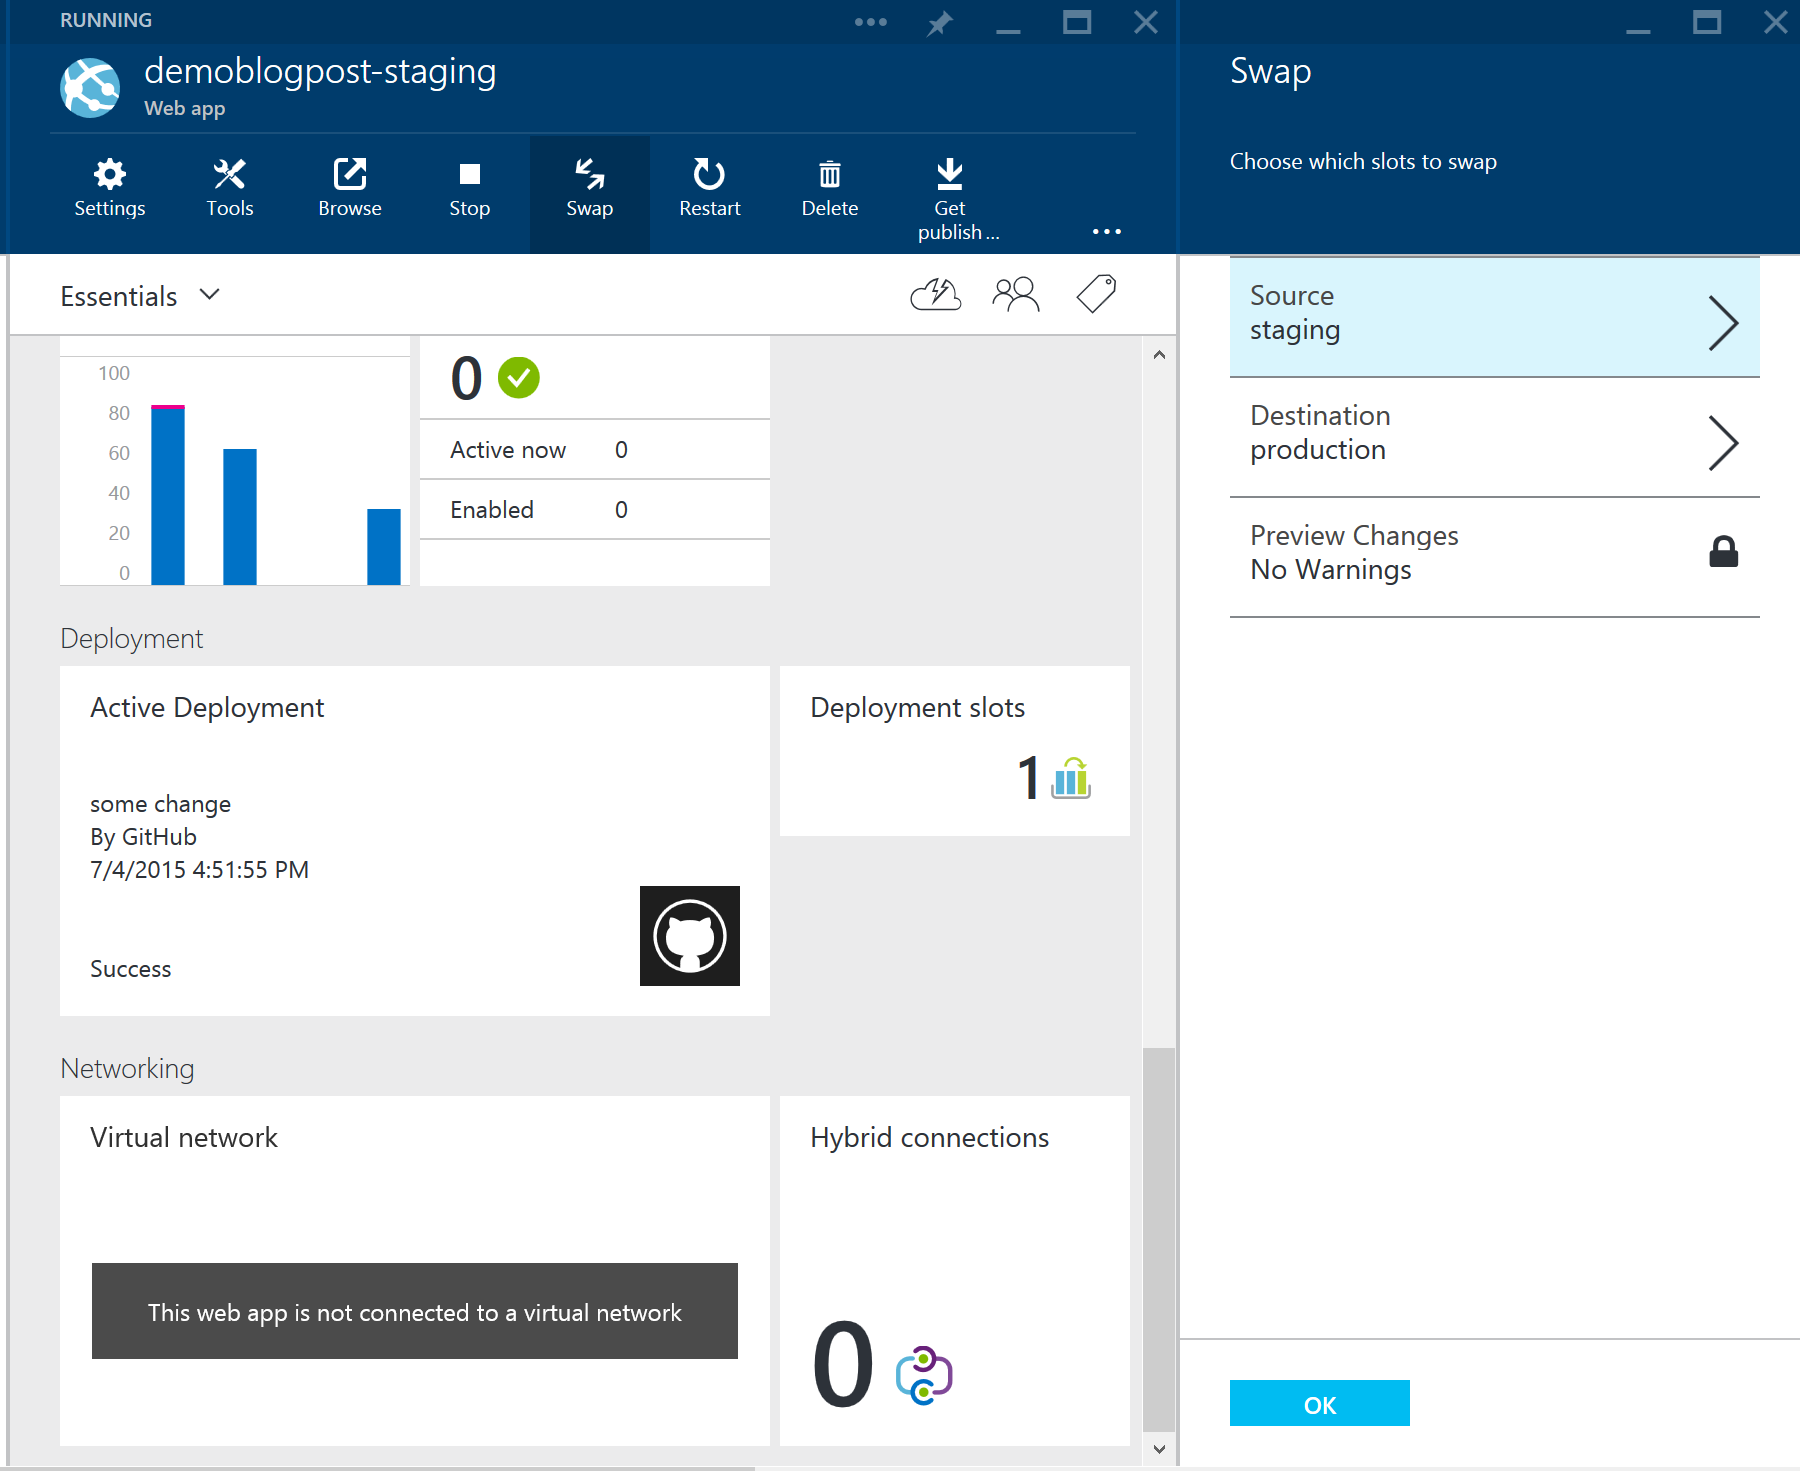 Done. So what happened when we swapped both web apps? Basically the file system of both Web Apps interchanged. So the production Web App now serves what was staging before and the staging one servers the files from the last deployment.
Conclusion
In this post showed how to easily configure a staging environment for you Azure Web App in order to deploy quickly but still have an environment where we can test everything.
In the next post of the serie "Continuous Deployment on Azure App Services" I will show how the build and deployment process can be customzied. Stay tuned!
And don't forget to follow me on Twitter to get an update when the next post is out.